• Skip to main content
  • Skip to primary sidebar
  • Skip to footer

That's Some Good Cookin

  • HOME
  • Blog
  • Recipe Index
  • ABOUT
  • CONTACT

Country Buttermilk Biscuits

March 4, 2011 by Terri @ that's some good cookin' 1 Comment

Country Buttermilk Biscuits

I have a terrific guest poster, my daughter, Tricia!  She has been going to culinary school through the Art Institute of America and is learning to make the most wondrous things.  Sometimes she saves a little bit of the food she makes and shares it with us…oh my goodness, I have been exposed to some high class cooking!

By now you have probably glanced back up at the title of this post, “Country Buttermilk Biscuits”, and are wondering how in the world country biscuits could possibly fall in the category of haute cuisine.  Wait until you see the pictures.  Even making beautiful, fluffy biscuits is all about technique.  Tricia makes these biscuits completely by hand so that she can ‘feel’ how her ingredients are behaving.  It was really fun to watch her cook.  The only tricky part was trying to keep up with her.  She kept working steadily and I would be taking pictures and asking questions, then I’d get momentarily distracted by one of the grandkids doing something adorable and when I’d look back I would have missed something.  Dang it.  Why couldn’t she stop cooking for a moment while I admired her children?

These biscuits are made with butter, no shortening.  Right there you know they are going to be amazing.  I had my mom over for dinner the night that Tricia made these and it is a good thing that Tricia had made a full, culinary school-sized batch because Mom devoured so many of them before dinner was served that she didn’t have room to eat anything else.  She took her dinner and six more biscuits home with her.

Enjoy the step-by-step tutorial below and start making your own gourmet Country Biscuits.  The recipe has been scaled down from the original, making approximately 18 biscuits instead of 36.  I am giving you the approximate cup/tablespoon/teaspoon measurements and the weight measurements (in parenthesis).  Weight measurements are more accurate than cup measurements because they give a more accurate amount.  Cup measurements vary depending on how light or packed your ingredients are in the cup or, as with flour, the amount of moisture the product contains.  So, if you have a kitchen scale, try using the weight measurements.  If you do not have a kitchen scale, lightly spoon your flour into your measuring cup–no scooping or packing in the flour!  ~Terri

Hi, all!  Tricia here!  I’m excited to share with you some of the things I’ve learned at school and through my own experiences. People always get intimidated by baking, mostly because of all the possibilities of screwing up and also partially because of all the little details that seem to be there just to make things more difficult, not because they’re necessary.  At school, I’ve been learning the reason behind all those seemingly meaningless, ridiculous steps.  I understand now why it’s important to have all ingredients at room temperature when doing the creaming method, or why I need to add the liquids and dry ingredients in intervals, starting and ending with the dry ingredients when making a cake.  Because I understand the importance behind it, I’m not bothered by all the little tasks and I don’t try skipping or simplifying steps that otherwise seem silly.  I want to share with you some of the “why’s” of baking and what better way than with biscuits!  If you can make a nice, fluffy, layered biscuit, then you can make an amazing pie crust and anything else that requires the biscuit method (also known as the ‘cut-in method’)!  So lets have at it!

Country Biscuits
Recipe adapted from the Culinary Art Institute of America; Demonstration by Tricia @ that’s some good cookin’
Printable Version

  • 5 cups (1 lb 4 oz) all-purpose or pastry flour
  • 2 teaspoons (.375 oz) salt
  • 2 1/2 tablespoons (1 oz) granulated sugar
  • 2 tablespoons (1 oz) baking powder
  • 14 tablespoons (7 oz) unsalted butter, cold
  • 1 1/2 cups (12 fl oz) buttermilk (approximately–depending on the moisture content of the flour–see tutorial below)
  • 1 egg with a little bit of water, whipped with fork–this will be used as a wash for the biscuits prior to cooking

Directions
**First off, the key to a successful product using this method is making sure that EVERYTHING is chilled.  If your house is warm, you can chill your bowl and dry ingredients first and/or you can place your bowl on top of another bowl filled with ice while you work.**

  1. Preheat oven to 425-degrees F.
  2. Sift the dry ingredients together, making sure they are blended thoroughly.
  3. Cut the cold butter lengthwise into quarters, then crosswise into large-ish cubes.  Work quickly and handle the butter as little as possible.  It is important for the butter to stay cool.  As the cool butter cooks inside of the biscuit it forms little steam pockets that create fluffy layers.
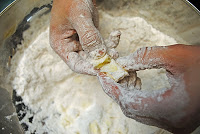
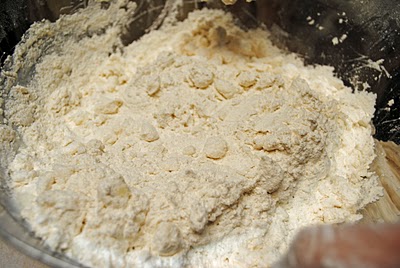
  4. Put butter into bowl with flour mixture and tumble butter with the flour to coat the cubes.  By hand break up butter into smaller, pea-size pieces.  The mixture will be lumpy with pieces of butter.  This is correct, perfect, absolutely right.  Do not squeeze, squish, stir, mix, or knead the dough to incorporate the butter. You want the end product to be butter coated with flour, not flour coated with butter.  It is the chunky bits of butter that will give the biscuits their flakiness.
  5. Add the buttermilk a little at the time, gently moving the dough around through the buttermilk after each addition until the mixture holds together well.  To test for correct moisture content, gather the dough into a ball and  hold it in your hands.  If the ball falls apart, put it back in the bowl and add more milk, working gently to keep from over mixing the butter and flour.  Over-mixing will distribute the butter too evenly into the flour and will also work the gluten in the flour too much. You don’t want a chewy, dense biscuit, you want a flaky, fluffy, buttery, delicious biscuit…trust me.
  6. Put the dough onto a floured countertop.  By hand, press out dough to a 1/2-inch thickness.  Cut into biscuits with a biscuit cutter. FYI: When cutting biscuits, press the biscuit cutter straight down.  Do not twist the cutter.  Twisting while cutting will seal the edges of the biscuits and prevent them from rising while cooking.
  1. Put the biscuits on a paper-lined baking pan.  Brush tops and sides of biscuits with egg wash.  Bake until the tops are light golden brown with the sides remaining almost white.
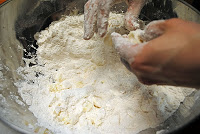
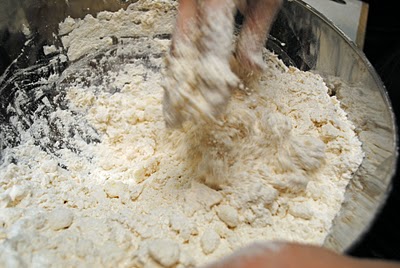
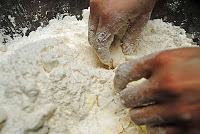
After sifting your dry ingredients and cutting the butter into large cubes, toss the butter into the flour, coating the butter with flour. Gently pull apart the butter into pieces about the size of a large pea; it’s ok if some of the butter is a little larger, but don’t try to go smaller.  The big pieces of butter make bigger flakes.  If the pieces are too small, the product won’t have very many layers if any at all, and if the chunks of butter are too big then the layers will be so big the product won’t stay together! Drop the broken pieces of butter back into the flour so that it can get coated again.  I like to use my hands instead of a pastry cutter because, one, it’s relaxing, and two, people tend to get carried away and cut the butter down to too small of pieces when using a pastry cutter. If at any time you feel that your hands are too warm and are melting the butter, put your bowl of ingredients in the fridge to chill the ingredients.
Country Buttermilk Biscuits    Country Buttermilk Biscuits
     Country BiscuitsCountry Buttermilk Biscuits
Here I have all the butter broken down to the appropriate size.  Now we’re ready to add the chilled liquid!
Country Buttermilk Biscuits
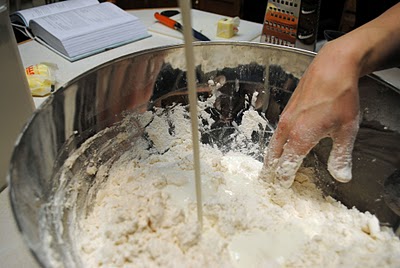
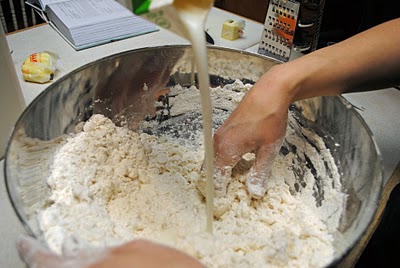
It is really dry here in Utah, so I have found that when making biscuits, pie dough, and bread products, I usually have to add quite a bit more liquid than what the recipe calls for, and that’s OK! (You cannot add extra liquids to cookies, cakes, and muffins.  It will ruin the balance of all the other ingredients)  The full recipe (the one that yields 36 biscuits) called for 3 cups of liquid, and on this particular day, I ended up having to use a little over 4 cups of liquid.  So, just because a recipe says to use 3 cups of liquid, it’s not set in stone (unless it’s a cookie, cake, or muffin recipe, then it is set in stone.  If your cookie dough is too dry, then it is most likely a mis-scaling on your part, so start over. But that is for another discussion on another day!).  If you live in a very humid climate or if it’s raining that particular day, you may use less than what the recipe says.  Does this make sense? I hope so!   Every day is an adventure with baking!
Country Buttermilk Biscuits
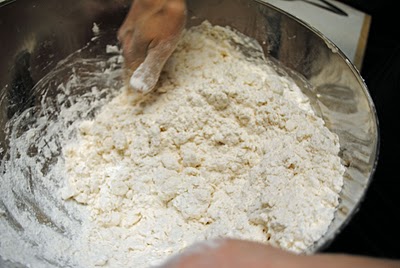
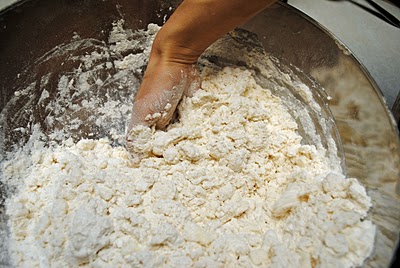
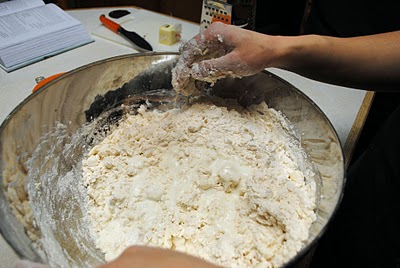
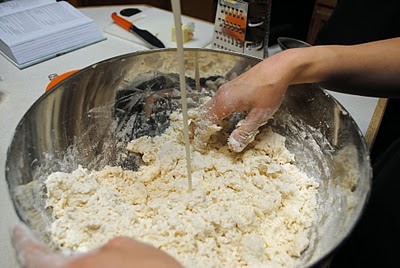
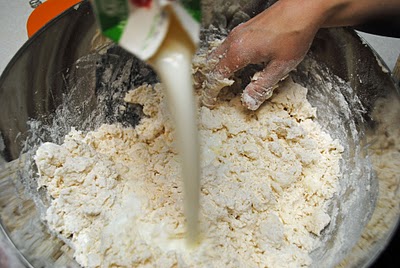
I add about 1/2-1 cup of liquid in at a time and I gently stir the flour with my hand.  Again, I like to use my hand because I can feel when the dough is moist enough, and also I build less gluten when using my hand, which then leads to a super delicious, moist biscuit!  You don’t want to it to be too moist or the product won’t have enough structure to keep it’s shape.
Country Buttermilk Biscuits
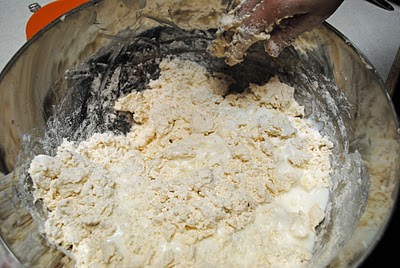
So, continue to add the liquid and stir by hand.
Country Buttermilk Biscuits
Keep going…
Country Buttermilk Biscuits
You’re getting closer…
Country Buttermilk Biscuits
…and closer…
Country Buttermilk Biscuits
…and even closer than a minute ago…
Country Buttermilk Biscuits
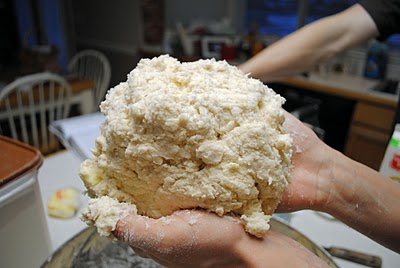
…ok, now seriously, you’re getting really close.  The dough is getting moist enough to try to form it into a ball to see if it’s ready.  To test it, gently compact the dough into a ball.  Don’t forcefully squish it together or you’ll squish the butter and incorporate it into the flour too much.
Country Buttermilk Biscuits
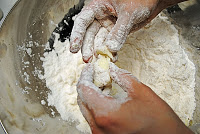
So, I made a ball, and it is not ready.  In this picture you can see that my “ball” fell apart because it is too dry, BUT it’s almost there.  The dough is moist enough to come together a little bit, but not moist enough to stay together without some serious forcing.
Country Buttermilk Biscuits
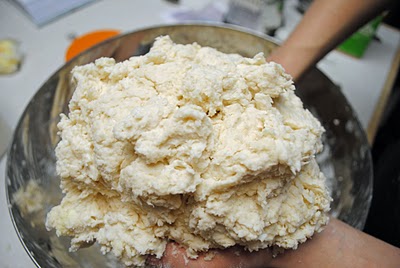
So, I added more buttermilk, a little bit at a time (about 1/4-1/2 c at a time), and stirred with my hand, and tried to make a ball…
Country Buttermilk Biscuits
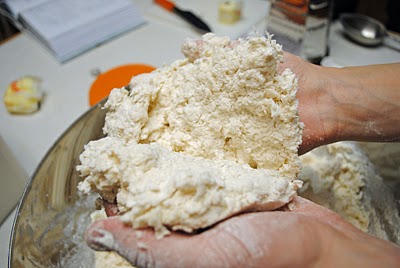
…and it worked!!  It stayed together!  Check it out! It’s so beautiful and scrumptious (with all that buttermilk and butter, how could it NOT be?).  You can see how it is moist and not dry looking.
Country Buttermilk BiscuitsCountry Buttermilk Biscuits
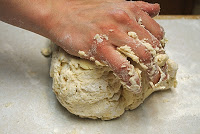
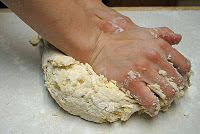
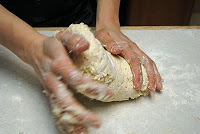
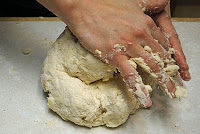
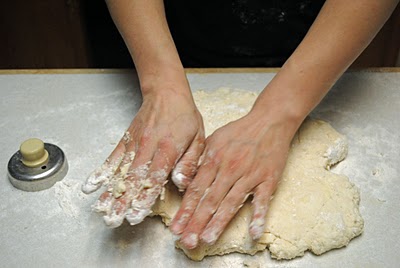
Next, lightly dust your surface with flour and knead your dough ball 5-6 times, but no more than that.  This builds up just the right amount of gluten to hold your biscuits together while keeping them super fluffy.
Country Buttermilk BiscuitsCountry Buttermilk Biscuits
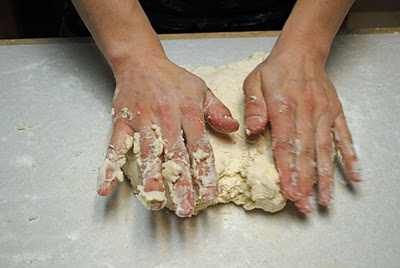
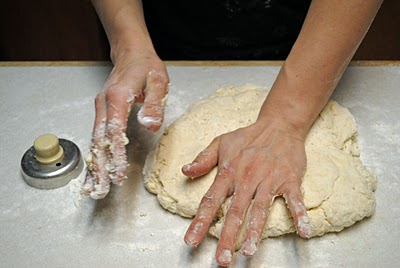
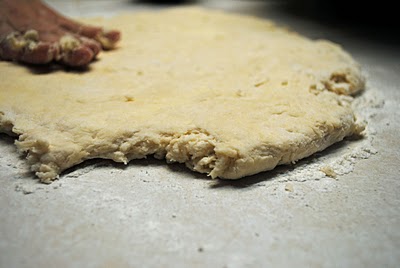
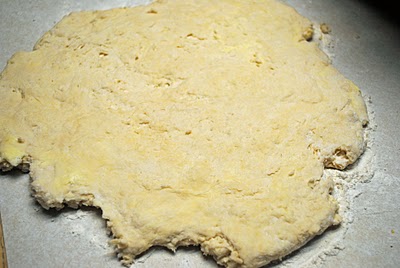
On your floured work surface and with your hands (a rolling pin is a no-no…it works the dough too much and builds unwanted gluten) gently press the dough out to approximately 1/2″ thick.  You can lightly flour the top of the dough to help it not stick so much to your hands.  Once it’s all flattened, you will see some beautiful marbling of the butter and dough.  This ladies, and maybe a couple of gentlemen, is what you want.  You WANT to see a lot of marbling going on.  You WANT to see some chunks of butter here and there (but not too many.  If all you see are chunks of butter and no marbling, then wad your dough back up and knead it a couple more times)
Country Buttermilk Biscuits
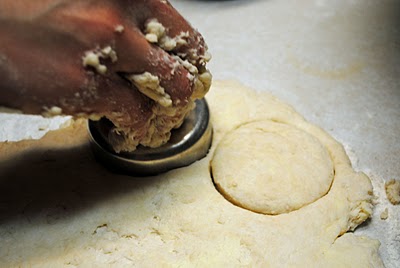
With a cutter, gently press down and maybe VERY slightly twist the cutter if you have too.  Cut the biscuits as close together as possible (yes, I could have gotten those two biscuits a tiny bit closer, but whatev. What’s done is done!).  You want to make the most of your dough, because all the scraps can only be pressed down and cut into biscuits once.  Meaning, once I press my dough out and cut the biscuits the first time, I’m going to have scrap dough left over.  I can take that scrap dough and press it out and cut biscuits out of it and then the remainder dough from that round is no good to make into more biscuits.  By that time, too much gluten has been built up and the biscuits will not be delectable.  Even that second round of biscuits aren’t going to be quite as fluffy as the first batch, but they will still be flaky and fluffy enough to swoon over.
Country Buttermilk Biscuits
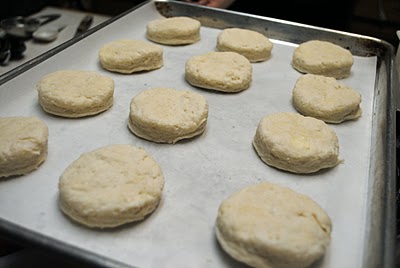
So, cut away and place on a sheet pan.  You can see layers already on the sides of the biscuits.  These are going to be goooooooood.
Country Buttermilk Biscuits
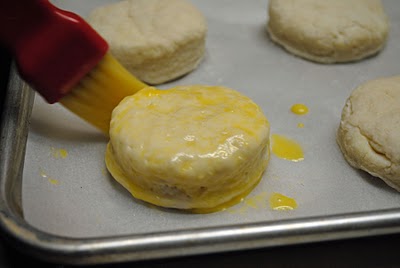
Now this step is optional.  If you want a really nice golden color, you can do an egg wash, but you don’t have too.  Your biscuits will still be amazing without an egg wash.  I just think it bumps up the “wow” factor that much more with an egg wash.  With an egg wash, you want to use the whole egg (with a little bit of water – the water helps break up the egg whites).  The protein in the yolk is what adds most of the color and some delicious flavor.  When proteins reach a high enough temperature, they brown.  It’s called the Miallard (pronounced “my-yard”) reaction.  Sugars caramelize at 330 F which adds the majority of flavor and color to a product, and proteins caramelize at even high temps and add more depth to the flavor.  You’ll see this on artisan breads.  They have a nice, deep, dark coloring. What people mistake as burning is actually the browning of proteins which is what you want. But again, this is for another post…an artisan bread post, perhaps?  Ok, so after coating them nicely with an egg wash, pop them in the oven…
Country Buttermilk Biscuits
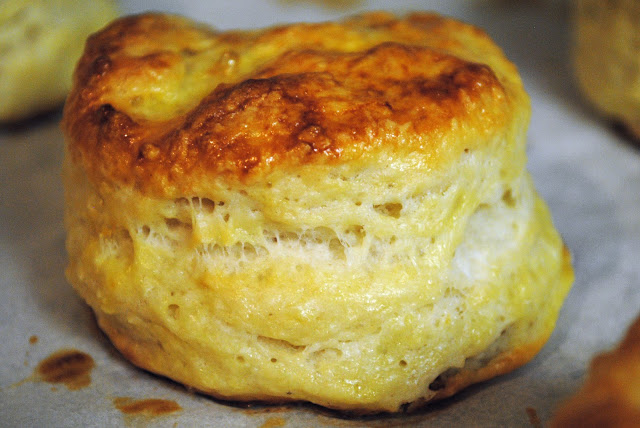
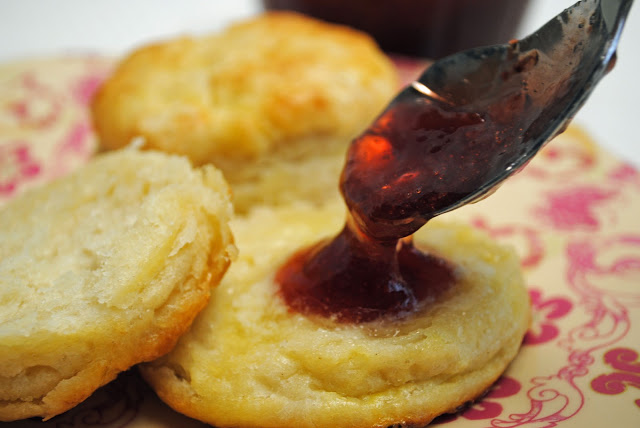
…and when they look like this, THEY’RE DONE!!  Oh my gosh…look at all that buttery, flaky goodness!  These seriously just melt in your mouth!  These biscuits ended up being about 2″ high.
Country Buttermilk Biscuits
Now, I hope I didn’t lose you with all my rambling.  I find the science behind all this stuff fascinating and I just get so excited about it all, I have to share it with everyone!  Knowledge is power, right?  Anyways, if you have any questions at all, please don’t hesitate to ask.   I honestly believe that the more you understand the “why’s” the better baker you’ll become.  Thanks for letting me share this with you!
 
~Tricia

Share this:

  • Pinterest
  • Email
  • Facebook
  • Twitter

Like this:

Like Loading...

Filed Under: Breads/Muffins/Rolls

Previous Post: « Blackberry Lemon Bars
Next Post: Best Chicken Soup with Orzo »

Reader Interactions

Comments

  1. Anne Tucker

    March 4, 2011 at 11:35

    Thanks Tricia & Terri! I LOVE the science behind it! I know Jeff & I would love an artisan bread tutorial with scientific comments. Baking crusty bread is his hobby. Darn it, now I want a biscuit….

    Loading...
    Reply

Leave a Reply Cancel reply

Your email address will not be published. Required fields are marked *

This site uses Akismet to reduce spam. Learn how your comment data is processed.

Primary Sidebar

Hidee Ho, Neighbor

I'm Terri - wife, mother, grandmother, nurse, blogger, former ski bum, lover of pie, family historian, and over-thinker. I created That's Some Good Cookin' because I truly believe that the best made is homemade. Join me for good food and a few belly laughs. Become an email subscriber and be the first on your block to receive my latest posts. (Look down...yep, just below where you're reading right now...see that "Stay Updated" window? It's waiting just for you!) Read More…

Footer

Terri’s Current Favorites

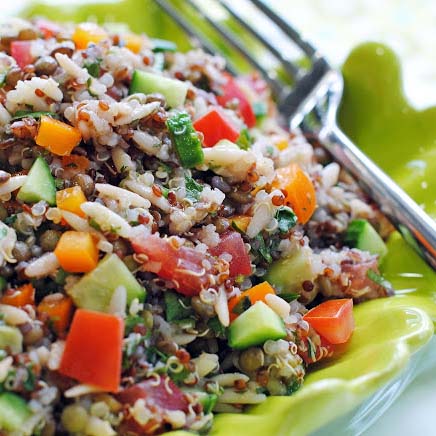
Lentil, Quinoa & Orzo Salad

Lentil, Quinoa, and Orzo Salad

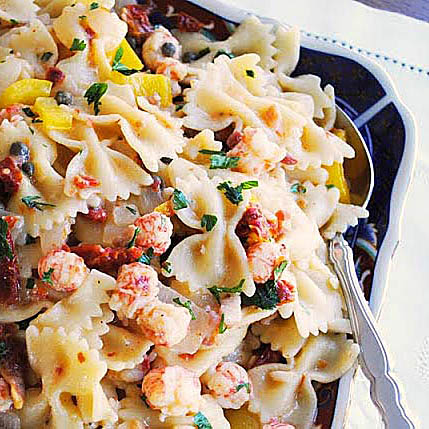
Mediterranean Langostino Pasta - Make tonight's pasta extraordinary with the addition of langostino, sundried tomatoes and Italian herbs.

Mediterranean Langostino Pasta

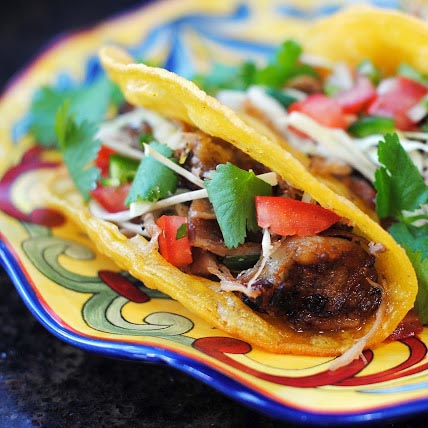
Pork Carnitas

Pork Carnitas

%d