

Is there anything that says hearth and home and peace more than a warm loaf of bread fresh from the oven? At least for me, there is nothing finer.
I know that an increasing number of people are finding that they are gluten intolerant, as well as an increasing number of people who are choosing to not consume gluten. I’m sorry for those who, by no choice of their own, cannot eat gluten. Food allergies can be miserable.
However, since I as yet am not intolerant of gluten, I am providing for you my favorite basic recipe for whole wheat bread. I buy whole wheat and then grind it into flour myself at home with an electric grain mill. My wheat of preference is hard white winter wheat. It has a milder flavor than red wheat and makes a beautiful loaf of bread. You do not have to grind your own wheat. Grocery stores or specialty food stores generally stock whole wheat flour. Often it is made from hard red winter wheat, but increasingly, stores are stocking flour made from hard white winter wheat as well.
Bread made from hard red winter wheat is probably the whole wheat bread with which most people are familiar. It makes a darker, hearty loaf; dense and rustic, with a distinctive flavor. On the other hand, hard white winter wheat makes a lighter loaf, with a finer texture. The flavor is more subtle than bread made with hard red winter wheat; more like “white bread”. It is my personal wheat of preference for making 100% whole wheat bread.
Making a good loaf of bread involves more than just having a good recipe. It takes a bit of practice to understand when enough flour has been added, or when the the dough has been kneaded ‘enough’, or even how to tell when the loaf is ready for the oven. It sounds intimidating to a beginner. My first loaves of bread…well…they were good learning experiences. Valuable learning experiences. Bread is often one of those things that just simply takes some practice. So, if your first loaves are not what you’d hoped, keep on working at it, you’ll figure it out. I promise. One day things will just click and you will have your ‘Ah ha!’ moment.
The whole wheat bread recipe below is designed to be used in a large capacity electric mixer, such as a Bosch, and makes four loaves of bread. A stand mixer, such as a Kitchenaid, can only handle ingredients for two loaves of bread. You know what to do, right? Yes! Cut the recipe in half. Good job.
How to Make Whole Wheat Bread, a Tutorial
The tutorial pictures for this post are fairly extensive; about 40 of them. So, don’t tell me that I don’t love you.


Now add the oil. A quarter cup of oil may sound like a lot of oil, but let’s do some math. 1/4 cup = 4 tablespoons. That means that each LOAF of bread has 1 tablespoon of oil in it. I cut each loaf into about 12 generous slices, so that means that each slice has 1/4 TEASPOON of oil. Still too much oil per slice? No problem–reduce the overall amount of oil to 2 tablespoons and then each slice will only have 1/8 teaspoon of oil per slice.
 Now, sprinkle 5 cups of whole wheat flour over the wet ingredients. /


When you get to cup #8, add it about 1/2 cup at a time, allowing the mixer to to work the flour into the dough. You will notice that the dough is beginning to stick to itself and is forming a central mass, but it is also still sticking to the sides of the bowl. Keep adding the flour about 1/2 cup at a time for cup #9 and cup #10 (if needed). At some magical point, usually between cups 9 and 10, the dough will leave or clean the sides of the bowl. This is the signal that the dough has enough flour in it. STOP adding flour and allow the mixer to knead the dough for another ten minutes. Make sure to keep the lid on the bowl–I have it off in these photos so that I could take pictures of the kneading process.
So, while the dough is kneading, heat your oven to about 150 degrees F. Newer ovens may only go as low as 170 degrees. Once the oven has heated. Turn it off, but leave the door closed.
/


While the oven is heating and the dough is kneading, prepare the baking pans. The pans will need to be greased. I usually just spray them with a cooking spray, then spread the spray around evenly with a paper towel.
/


Isn’t it amazing??????
/
Alrighty. Time to get back to work.
/


Open the oven and place the pans side by side allowing a little room between each pan. The bread pans should not be touching the edges of the oven.
/ Heat the oven to 150-dgrees F (as low as 120-degrees F if your oven can be set that low). Some ovens cannot be set any lower than 170-degrees F, so simply turn off the oven before it reaches the 170-degree F. The point is to have a warm oven, not hot, just warm. After the oven has warmed, turn it off. Place a damp kitchen towel (preferably not terry cloth) over the loaves of bread. Close the oven door. Turn on the oven light, which will help to keep a warm environment for the bread to rise.


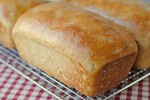
 Take the bread out of the oven, remove it from the oven and place each loaf on a wire rack to cool. While the bread is still hot, rub butter over the top of each loaf, if desired.
/

Here’s a Tip: I’ll share a little trick I learned to help the bread stay moist and tender while it is cooling. Using the same damp towel that was draped over the bread while it was rising, place the still damp towel over and around the loaves while they are cooling. If the towel is no longer damp, simply moisten it again, wring out the water well, and place the towel over the bread. As soon as the bread has cooled, place each loaf in a plastic bag and tie securely closed. If you’d prefer, you can slice the loaves prior to putting them in the bags. Any loaves of bread that you will not be using within a day or two can be wrapped and frozen. Remove from freezer as needed. The frozen bread can be removed by the slices as needed or the whole loaf can removed and defrosted for use.
I hope that you enjoy your delicious homemade bread.

Like warm, tender, sweet, homemade dinner rolls? Of course you do!
For a GREAT roll recipe with step-by-step instructions see my Paradise Dinner Roll recipe, which is sort of a King’s Hawaiian Roll knock-off…except BETTER!
Learn More About It:
- Vital Wheat Gluten – The Kitchn post, “Vital What Gluten: What Is It and When Should It Be Used?“
- Dough Enhancer – Studio 5, includes a video, written information regarding the ingredients in a dough enhancer and the purpose of each ingredient, information on making your own dough enhancer, and a recipe for wheat bread using the ingredients for a homemade dough enhancer. “Make Your Own Dough Enhancer.“
- White Wheat – Whole Grain Council post, “Whole White Wheat FAQ“
100% Whole Wheat Bread
Ingredients
Please note: This recipe is designed for a large capacity mixer such as Bosch home mixer. If you are using a stand mixer, such as a Kitchenaid, please halve the recipe.
- 4 cups warm water, divided
- 3 tablespoons instant yeast (I like SAF brand)
- pinch of sugar
- 2/3 cup honey
- 2-4 tablespoons oil (I use 4 tablspoons)
- 2 tablespoons salt
- 2/3 cup non-instant powdered milk
- 3-4 tablespoons dough enhancer (optional)
- 1/4 cup vital wheat gluten
- 8-10 cups white winter whole wheat flour
Instructions
- Stir yeast into 1 cup of warm water with a pinch of sugar. Allow yeast to activate. Watch carefully because the yeast can get very active very quickly.
- While the yeast is activating, pour the remaining 3 cups of warm water in the mixing bowl of your mixer. Add the honey, oil, salt and the activated yeast.
- Sprinkle 5 cups of the whole wheat flour over the liquid ingredients. Sprinkle the powdered milk, dough enhancer (if using), and vital wheat gluten over the flour.
- Put the dough hook in place and toggle the control of the mixer a few times to mix the ingredients. Turn mixer on to medium power and allow the machine to work the dough for about 7-10 minutes.
- After the dough looks smooth and the ingredients are well incorporated, add cup #6 of flour. Allow the mixer to incorporate the flour into the dough, then add cup #7 of flour, again allowing the mixer to incorporate the flour.
- The dough will start getting thicker and heavier, add #8 cup of flour 1/2 cup at a time and allow mixer to incorporate the flour. The dough will be much heavier and will require a higher setting on your mixer.
- Cups #9 and #10 need to be added in half cups also. However, probably somewhere between cups 9 and 10 you will notice that the dough is no longer clinging to the edges of the bowl. When you see this happen, stop adding flour to the dough. Put the lid on the bowl and allow the mixer to continue to knead the dough for another 10 minutes.
- After ten minutes, check the dough. It should look smooth and elastic. It will be tacky, but it should not be sticky. There's a difference. Sticky dough clings to your fingers indicating that it is too wet and may need a little bit more flour. A standard for telling if the dough has enough flour in it is to take two floured fingers and stick them down into the dough. If your fingers come out clean with no dough sticking to them, then your dough does not need any more flour.
- A smooth elastic dough will have tiny air bubbles just under the surface. Additionally, if you try to gently pull a small pinch of dough from the main body of dough it will stretch away from the dough. If it snaps or tears away, your dough requires more kneading.
- Once the dough is ready, lightly oil your hands and the work surface. Turn the dough out onto the oiled work surface and shape into a ball. Turn the ball of dough over and then over again to pick up a very light coating of oil.
- Cut the ball of dough into fourths. Try to make them as evenly weighted as possible. I use a kitchen scale for this task. Gather each fourth into a ball and allow to sit on counter while you prep the baking pans.
- Preheat the oven between 150-170 degrees F. Spray each bread pan (I use an 8-inch bread pan) with cooking spray. Take a paper towel and use it to wipe the cooking spray evenly around the interior of each pan.
- Knead each dough ball a few times to work out gas bubbles from the yeast. Form each dough ball into a loaf shape and transfer them to the bread pans.
- Turn off the oven and place the pans inside the oven for the dough to rise. Using a damp, well wrung out kitchen towel, place the towel over the dough while it rises. This will keep the dough from drying out.
- Once the dough has doubled in bulk and has risen about 1 1/2-inches above the top of the pan, turn the oven on to 350-degrees. Yes, you should leave the bread in the oven during the heating up process, this will be a part of the cooking time. The bread should be ready in about 30 minutes, maybe even sooner. Check on it after 20 minutes to see how things are progressing. The bread is ready when it turns golden brown.
- Remove the bread from the oven, take out of the pans and place on a wire rack. If desired, the tops of the bread can be buttered at this time. Additionally, I have a trick that I like to use to help the crusts stay soft while the bread is cooling. I take the same damp towel that I used to cover the bread when it was rising and use it to cover the bread while it is cooling. The moisture from the towel and the heat from the bread help to make a great environment for having soft bread crusts.
- Place the bread in plastic bags as soon as it is cool. Bread that is not going to be used within a couple of days can be frozen for future use.


Wow! What a labor of love. I do enjoy making bread from scratch and this recipe looks delicious. Fantastic pics and tutorial!
Wouldn’t you know I came here lookin’ for a whole wheat bread recipe and you just posted one! And I’d love to make that chili to go right along with it! And some artichoke dip. You are reading my mind! 🙂
Ooo.. and I’m going to follow that awesome tutorial! (Except that I have a Bosch rather than a KitchenAid.) Great pictures and steps!
I have recently gotten back into making bread from scratch and can’t wait to try this recipe. I love all the pictures and precise instruction. I am new to blogging and love when I find a new blog to follow. If you have a minute to spare check mine out too. Thanks again, and I’ll definitely be back for more recipes.
Savoring Time in the Kitchen–This bread is actually very easy to make. I did an in-depth step by step just in case someone was a beginner bread maker. The mixer does all of the hard work of mixing and kneading. I almost feel like I cheat when I make homemade bread compared to what I watched my mother go through when she used to make bread for us kids. Thanks for the compliment on the pics and tutorial. Compliments are always welcome!
Kristin–The recipe is designed for a Bosch so it should work well. I’ve had my Bosch for 14 years and it still works just as well as the day I bought it. That thing is a work horse. It is definitely made for big batch items. Doesn’t seem to work as well on smaller batches, I’ve noticed. How sad, I have to double my cookie batches…hmmm. (tongue in cheek on that comment).
Michelle–welcome! It’s nice to have you here. I’ll definitely drop by your blog.
can the non instant milk be replaced by whole milk in this recipe?
Yes, delete the non instant powdered milk and the water. Replace the water with 4 cups of milk.